Sunday, January 31, 2021

My Experiences When Germinating Seeds


I am not sure how many people have tried to germinate seeds from seed trays and then get irritated when they don't germinate the way you think that they should.  I know I have and have been extremely aggravated in the past.  Well like many other people, I have researched how to make my germination rate better. 

 Well who would have known that Jiffy gives you the best instructions on how to germinate seeds and it is right on the packaging too!  I laughed at myself for not doing this before.  So last week I decided that I needed to start germinating some tomato seeds, in fact I am trying to germinate 108 tomato plants.  Well the first tray was a 36 seed tray that I have 12 Best Boy Tomatoes and 24 Brandywine Tomato seeds.  As you can see in the picture below that I have a 100 percent germination rate on the 36 seed tray.  


So here are the steps that I took to achieve this 100 percent germination rate.
    1. For the 36 seed tray I took 5 cups of warm water and poured over the peat moss pellets.
        Let the water soak in and expand which I gave it an hour. And if needed drain the excess water out         of the tray. 
    2. Then I dropped 2 to 3 seeds in each pellet and then covered them.
    3. After that I put the lid on the tray.
    4. And then I stored the seed tray in an area where it would not receive direct sunlight.  

For our seeds it takes 7 to 10 days for them to germinate.  Always look at your seed package to see how long it takes for the seeds to germinate.  We used Burpee Seeds for our tomato seeds.  You can get the seeds at either Amazon.  You can get these seed trays at Amazon.  

I hope this helps you get the best germination rate possible and wish you happy gardening.  


Our links above are from our Amazon Affiliate Program, please see the disclaimer below. 


Disclaimer:

Amy Maria Watson Co. is a participant in the Amazon Services LLC Associates Program, an affiliate advertising program designed to provide means for sites to earn advertising fees/ commissions by advertising and linking to amazon.com.

As an Amazon Associate I earn a commission from qualifying purchases. My commission is earned when customers click the links and proceed to purchase item(s) or subscriptions. 

I don't earn a commission based on "paid per clicks". Please note that purchasing items from the links provided on this website doesn't imply that you're getting a special discount, it just helps businesses like mine to earn a commission based on purchases promoted/ advertised on this website. 

Wednesday, January 13, 2021

When you have livestock do you name them?

 This is one of the questions that I get a lot.  I know a lot of people like to make their animals as personable as possible.  And all animals have their own personalities.  But is it necessary to name all of the livestock on the farm or homestead? So here are a few questions that you should ask yourself.

1. Do you plan on using your livestock as a source of food?  If the answer is yes, then I highly suggest that you do not name your livestock.  For instance, we had a chicken that my oldest named and my wife and I told all of the kids not to name them.  Well we processed all of the chickens one day and that evening my oldest asked where her chicken was.  When she found out she cried and didn't eat chicken for a month.  It has been noted that when people name their livestock that psychologically they would not be able to eat their livestock.

2. Do you plan on using your livestock for purposes like eggs, milk, or land clearing? If your answer is yes, then it would be safe to name your livestock.  I have named my laying hens because I know I will keep them for about four years and then I can decide whether or not to let someone else take them, make them a stew bird, or let them live out their days on the homestead.  We used to name our goats because we don't eat goats but enjoy watching them.  

3. Do you plan on selling your livestock?  This is tricky because by doing so you could get an attachment that would cause some grief once the livestock is gone.  But for some it would not bother them at all.  So this would determine in how your attachment to your livestock is.

Hopefully, this helps when it comes to knowing whether you should name your livestock or not.  Stay tuned for more blogs coming soon.  

Tuesday, January 5, 2021

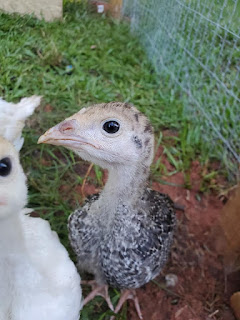
Turkeys: what to know when you raise them

 Turkeys are one of the most difficult poultry livestock to raise, it's not impossible but it isn't easy either.  I remember as a kid that we had four turkeys but I didn't know what all was done to make it a successful task.  In 2020, we decided to take on the daunting task of raising turkeys.  And one of the main reasons was because we eat a lot of ground turkey and at the time ground turkey was over $5 a pound.  So after doing some research I ordered 15 turkeys.


I researched where would be the best place to get my turkeys from and read a lot of reviews.  I ended up going through Welp Hatchery and the customer service there was amazing.  A few weeks later we received 15 turkeys (5 broad breasted bronze, 5 giant whites, and 5 chocolate).  And if you are interested in what types of turkeys they have here is the link: https://www.welphatchery.com/turkeys/


So the day came and I received the phone call from the post office that our poults had arrived.  And I was excited.  I had already went out and purchased some feed that was high on protein because this is very important for turkeys especially when they first start out.  Also, I made sure that I had a heat lamp and a brooder for them.  Well within the first two weeks, I lost two chocolate turkeys.  So my flock was now down to 13 poults.  And to this day I just don't know why they died, but in my experience I have seen that turkeys are weak when they are young and find ways to die.  So along with the high protein feed, I would put a teaspoon of apple cider vinegar in their water which helped them and seemed to give them more energy.  

After having them a month I started letting them outside in another brooder and let them just get fresh air.  Well one day it started to sprinkle and low and behold these turkeys are standing there looking up to the sky with their mouths open.  I remember my dad telling me that poults will drown themselves when it rains. So I did a mad dash and put them back inside in the brooder.   Well a few days later one of my giant white poults was dead.  Now my flock is down to 12.  


Well after 5 months the turkeys had grown to be bigger than I thought they would be. And maybe that is because they are an aggressive eater. I combined my chickens and turkeys in the same paddock and didn't think anything of it.  Well a few weeks later I noticed another Giant White stumbling and acting weak.  And then I saw little black spots on the head.  Well this is called Blackhead disease and after conferring with a few other homesteaders and farmers who have raised turkeys a long time they said that apple cider vinegar in water helps.  And right now there is no current treatment for blackhead disease so I gave my whole flock of chickens and turkeys some.  Well the giant white didn't make it but the rest did.  So now my flock was down to 11.  


After 7 months of raising the turkeys I had 11 still and it was processing time.  I had 6 gobblers and 5 hens.  Our plan on this homestead is that we would keep 4 or 5 to help replenish the flock for the next few years so we would not have to keep purchasing more poults.  A turkey hen can have between 12 to 15 poults and if we keep 3 hens and one or two gobblers then we could replenish our flock for a few years.  So that is our plan for this part of the homestead.  However, there is one thing to add.  Turkeys much rather sleep under the stars than in a coop.  If we do not put them in the coop at nights I will find them roosting on our privacy fence or on top of the coop.  So I recommend that you feed them in the coops in the evening and then shut the coop.  

I am still learning and researching because they will through you for a loop just when you weren't expecting it.  They are curious and very aggressive when it comes to eating.  And they like shiny things like rings and they will peck them too.  But this experience has been fun and I have learned a lot.  So stay tuned to more posts about our homestead and a few tips from the things we learned.  

Monday, January 4, 2021

It's January and that means it's time to start planning!

 Hello Everyone! Happy New Years ( I know its 4 days late)!!!  So one of my biggest questions that I get is when is it time to start preparing for your garden and livestock rotation.  The way I was raised and the way I used to do things are two separate ideas.  I was raised to start planning the garden in January.  What I have been doing until recently is wait to the last minute.  In this blog, I will be going over why it is important to start planning in January.

So yes I am a huge procrastinator and one thing 2020 taught me was that I need to get rid of that flaw immediately.  So here it is 2021 and I am taking on what was passed down to me when I was a kid and it did help tremendously because we were never out of food.  So January is the best time to start planning what you are going to do with your garden and livestock.  The main reason is that you can start getting prepared and start growing the food you need at the beginning of the growing season.  This way if something goes wrong, you have the whole growing season to remedy the issue instead of a couple of weeks.

So this is what you need to do (or at least what I do).  Grab a notebook and write down what you would like to grow.  Then look up when do these items grow (such as in the southeastern region of the United States iceberg lettuce can be planted in January).  Find out what do these plants need to be successfully grown, like does it need full sun or partial sun just to name one example.  Now survey the area where you want to grow your vegetables at and draw it in your notebook.  Start marking where you would want to grow items.  If you plan on growing in raised beds then start getting the materials ready to make your raised beds.  Or if you plan on growing in the ground, then you need to start preparing the soil for what you are growing.  And then finally figure out where you want to purchase your seeds.

When it comes to livestock you need to take a few things into consideration.  For instance are you new to raising this livestock or have you already raised them and need to replenish your herd or flock.  Another thing you need to look at is whether or not you have an area prepared for the livestock you are getting.  And finally if you have the materials for the area to either build or make repairs.  For my family and farm, we eat a lot of turkey and chicken.  And we raise chickens in a rotation so right before we do our final harvest we have order new chicks to start the cycle all over again.  Our turkeys are different. We initially purchased 15 turkeys but lost 4 prior to harvesting time because turkeys are harder to raise (this topic will be a totally different blog post).  However, the plan when we first purchased the turkeys was to be able to raise a flock that would multiply and we are doing this buy keeping 1 tom (gobbler) and 3 hens.  This way we could have up to 45 turkey poults the next year and that could be extra income for the farm and enough turkey to help sustain us for the year.  

These are the steps that I do (now and as a kid) prior to getting ready for the year's growing season. Some of the places that I get my seeds are Seeds of Change (seedsofchange.com) and Burpee Seeds (www.burpee.com).  And I get my chickens and turkeys from Welp Hatcheries (www.welphatchery.com).  I hope you find this informative and feel free to follow us.