Thursday, June 7, 2018


Life Back on the Farm

So in 2013, my family left the farm and went back to the suburbs of Savannah, GA.  At that time, we all thought farming was over with.  We decided to combine A and B Farm with our custom furniture line that we have been doing, Moss and Saltwater.  And now here we are 5 years later living at the farm again.  We have been here for over a year and life has definitely threw us some curve balls.  In the past month or so, my wife and I have been talking about becoming more self sufficient and starting the farm back up.  So today I am announcing to everyone who is reading this that we are going to start our micro-farm back up.  In addition to farming, we are still doing our custom furniture builds, which we will be posting items in our products page of this blog.

So what should everyone expect to see.  Well for starters we have two goats and are wanting to expand our herd to at least 10.  The second step is that we are planning on converting a quarter of an acre to growing vegetables and flowers.  And third, what is a farm without chickens, so we have to build a chicken coop and several raised beds and fences.  Stay tuned to what we are doing next and follow our blog.  Have a great day everyone.  

Friday, January 13, 2017

Handy Tools

Handy Tools

So I have been asked about what are some of my favorite tools that I use in the woodshop. My. It also answer is that I love all of my tools equally. Definitely not a Tim the Toolman Taylor answer right? Well this past Christmas, my wife and kids got me some pretty cool items. One of these items is a wristband that is magnetic.  I absolutely love this device.  So this device helps me when I am working on a furniture piece by letting me put all the screws or nails that I need on it.  So I will have everything I need on my wrist instead of having to search for them in a box or having to stop and reach for another item.  You can buy these at Walmart and they are called MagnoGrip Magnetic Wristband.  Definitely worth the money and will save you some time.  Stay safe my friends.  


Tuesday, January 10, 2017

A New Season

    So in life change is inevitable, something somewhere is going to change and we all have to adapt and over come it, right?  Well with that being said I am excited to announce that A and B Farm has now merged and changed to not only about self sufficiency but home decor with Moss and Saltwater.  Yes we will still post stuff on self-sufficiency, but we are going down a different road as well.

   Right now we are turning wood from trees that have fallen from Hurricane Matthew into amazing products like wine bottle stoppers and bowls.  Also, we have new products that we are now producing. We are making Entryway Tables, Coffee Tables, End Tables, and Custom Indoor Dog Crates.  These are just a few of the furniture pieces that we will be showcasing from use this year.

   I look forward to a great year ahead.  Take care my friends.

Monday, October 17, 2016

Working Together

In the past week and a half, I noticed how a community can come together for the good of everyone there.  I am speaking in reference to the events of Hurricane Matthew.  This storm barreled into Georgia, where the last major hurricane hit in 1898.  The communities in southeast Georgia needless to say were not prepared.  

During a time in our country where it seems that everyone is not working together or after publicity and fame, we needed to see togetherness.  Well the aftermath of Hurricane Matthew, communities came together as a whole to help each other out.  Some areas did not see Red Cross relief or aid until seven days after the storm, so neighbors relied on neighbors.  

I remember a time when neighbors would help neighbors without being asked and not wanting compensation.  In my neighborhood I saw that come to pass.  There were days of seeing neighbors working together to cut up trees that had fallen from the winds and water soaked ground.  I saw neighbors sharing water and food.  This made my heart happy to see the togetherness.

When we work together as a whole, amazing things can happen.  It is important for everyone to be able to work together and help each other out.  Remember we are not here on this Earth alone, there are people who would be willing to help, if not give you the shirt off of their own back.  Take care my friends.

Tuesday, September 13, 2016

Table Saw Project Part 3 Building a Counter top

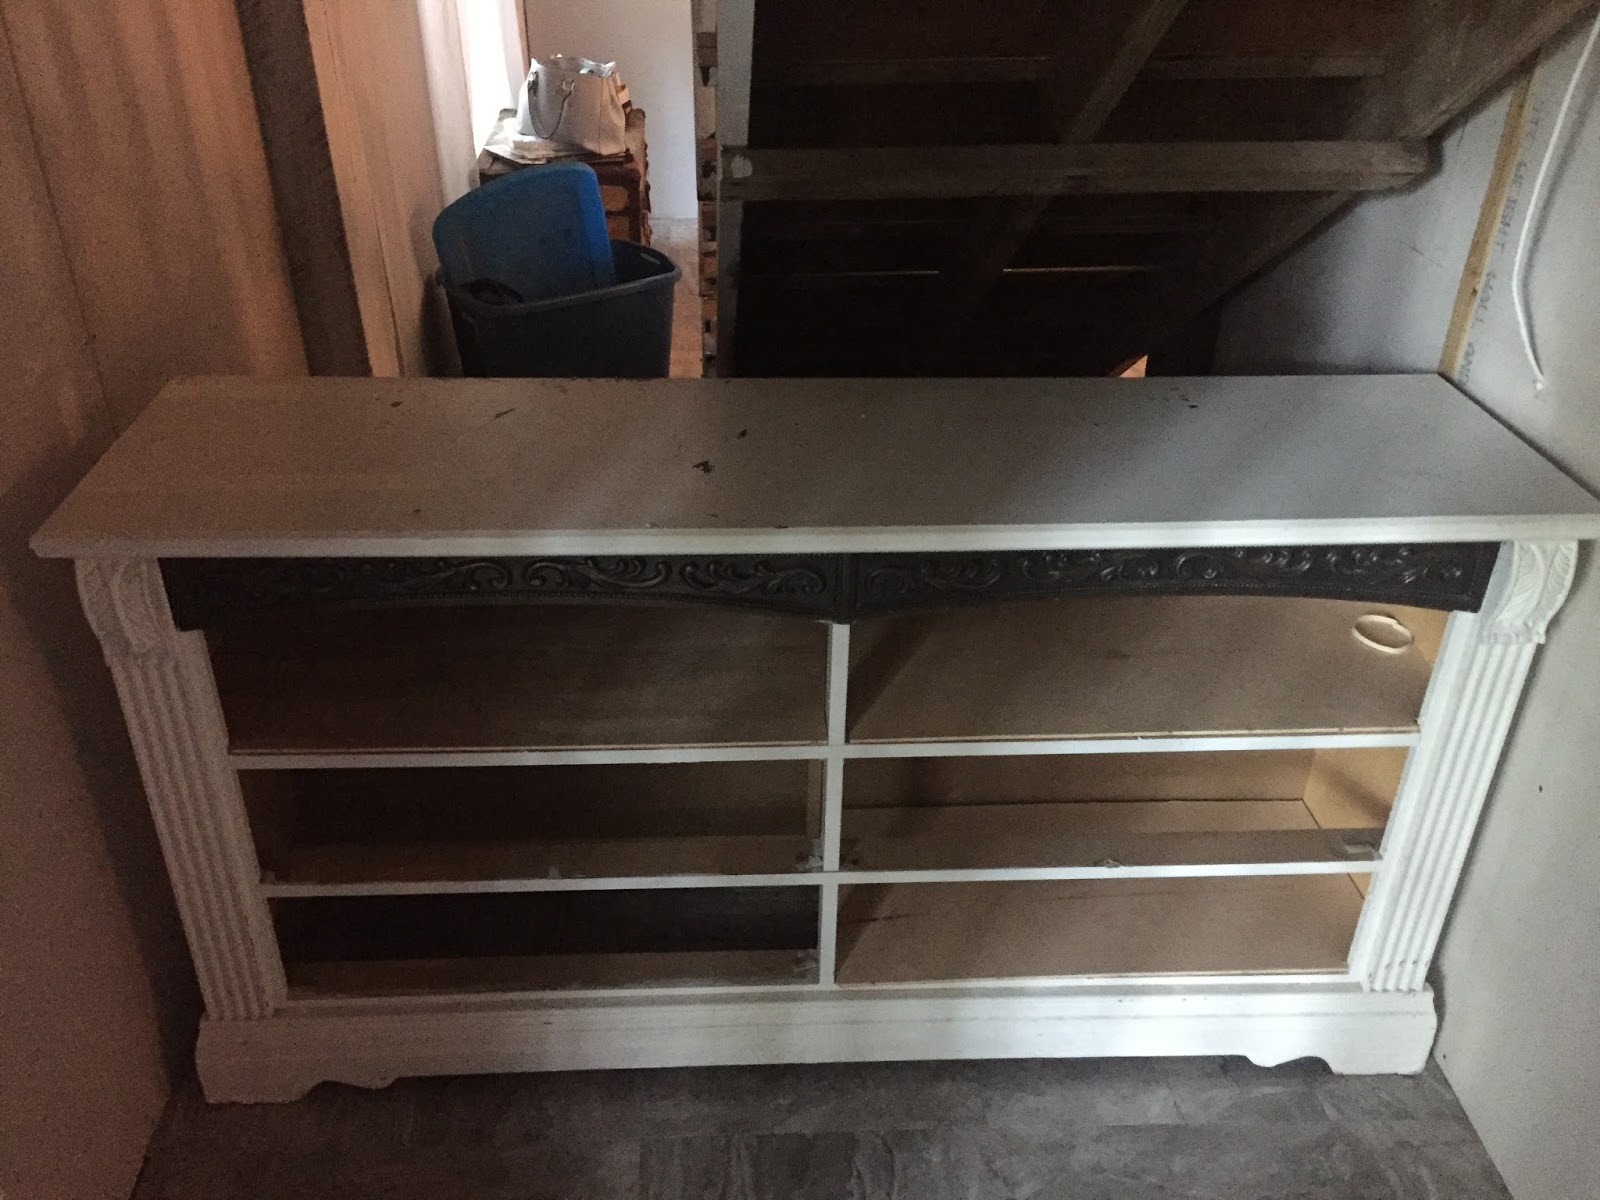
And repurposing an old dresser.

 
           So this is part 3 to our table series.  The first two series covered table saw safety and how to rip boards with a table saw.  Well this is about bringing the two together and building something from it.  I know you will see that I have used other tools and an old dresser as well, but that is the beauty of woodworking.  So how about we get this show on the road.
 
           So the first step to this project is make sure you have all of the right tools and supplies.  I used 10 boards of various sizes, a dresser, a table saw (with a make shift guide), biscuit joiner, biscuits, sander with sand paper, wood glue, and what ever varnish needed. After setting all of this aside I began inspecting which side of the wood was going to be the top and which was going to be the bottom.  Of course, the nicer side is always going to be my top side. 

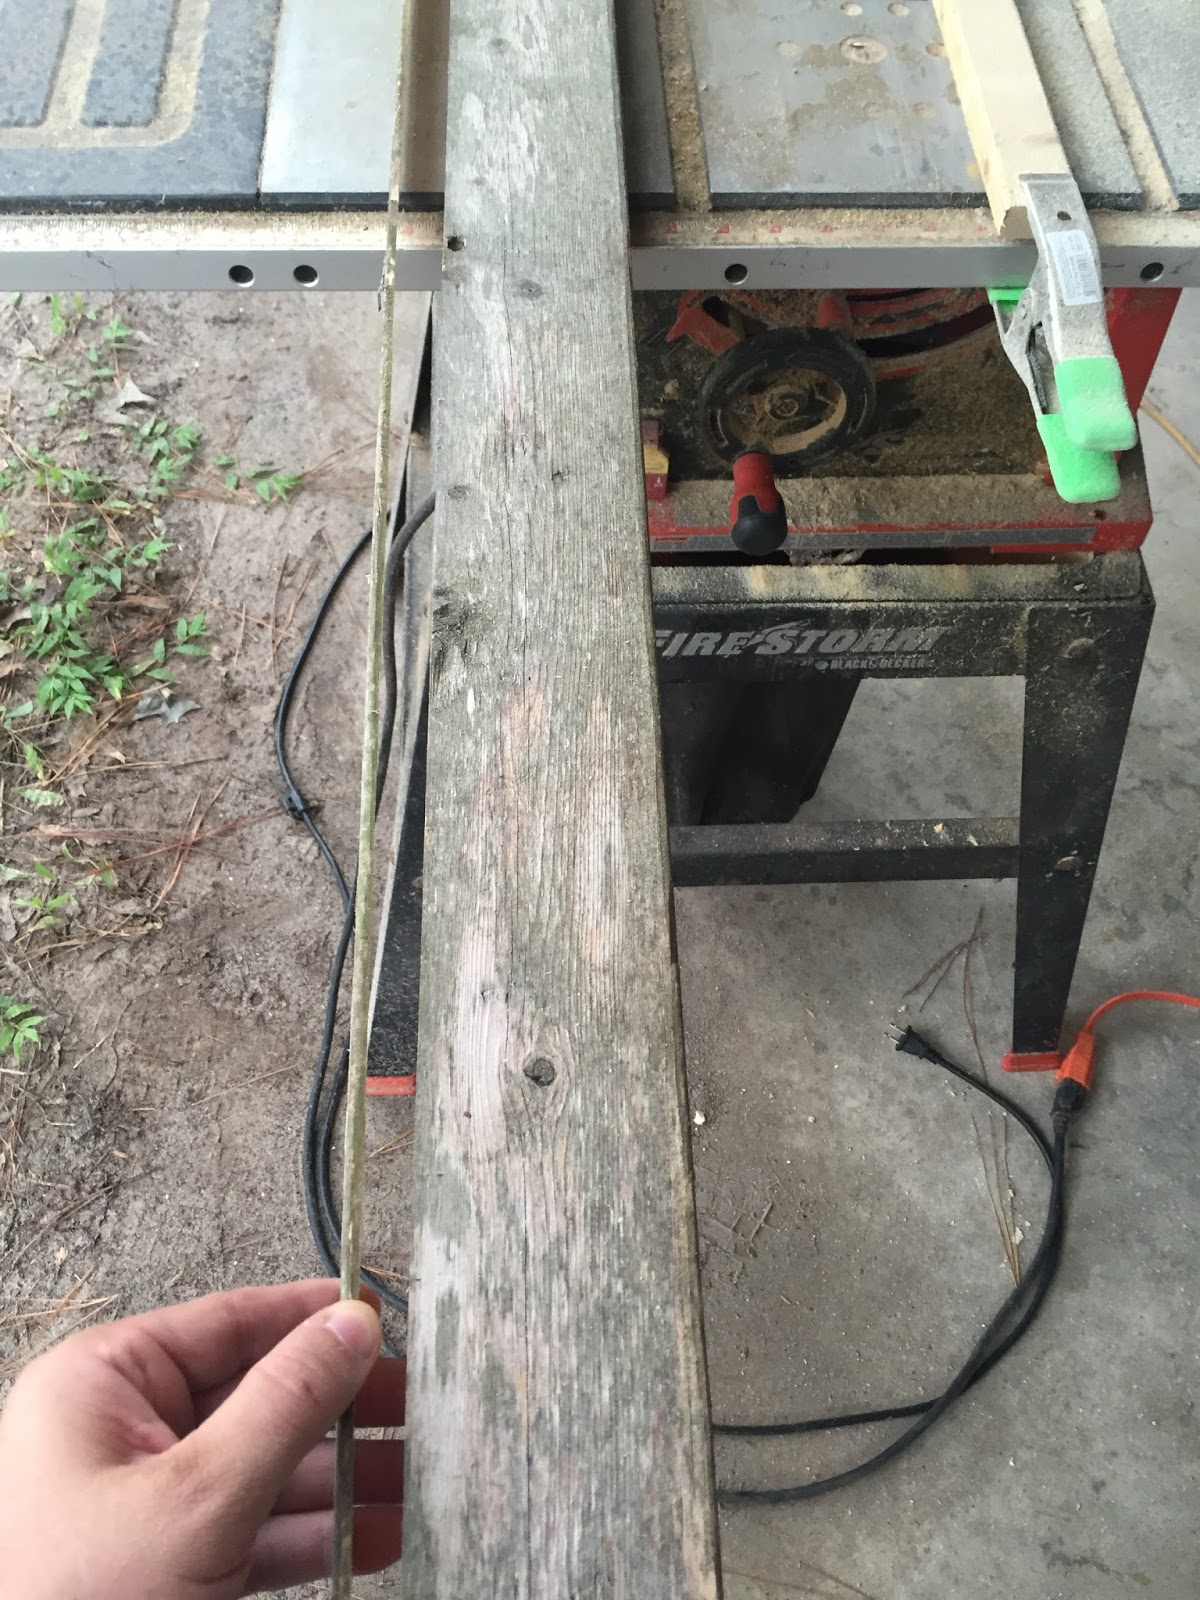
          The next step is to rip the boards.  I wanted to rip .25 inches from each side of the board so I would have a flat smooth edge.  I would measure from the side of the blade the majority of the would will be on to the guide rail from the front and back side of the blade so I would have an accurate cut.  After I lock my guide into place I would then begin ripping my boards. 

 
           After ripping all of my boards I will line them up so that I can mark where I need to place my biscuits.  It is important that the cuts for the biscuits are lined up so when joining the two boards together they would be the correctly join.  So to do this I used a pencil and marked each board as they were lined up so each mark corresponded with the mark on the board next to it.  And then since I was using biscuit size 20, I selected 20 on my biscuit jointer and then began making my cuts.


          Then next step is to line the boards up and put the biscuits in them and glue the boards together.  By gluing and joining the wood with the biscuits, the wood gets strengthened.  And of coarse it definitely helps the bonding process when you clamp the boards together and let them sit and cure for at least 24 hours.


           The next step is the part that starts the finishing process of the counter top.  First, I removed the clamps and then began sanding.  I used a coarse grit of 36 with my belt sander and the final sanding was used with 320 grit with an orbital sander.  The 320 grit made the wood feel like glass (meaning it was incredibly smooth).  After the sanding I put the varnish of my choice on the wood and then let it dry.  While letting the varnish dry I began working on the dresser that I was going to repurpose.  I knew there was a section of shelving that needed to be removed which I did by using my hand saw and a mallet.  Once that was done, I had to play the wait game for the varnish to dry.  Once the varnish dried, I moved the counter top to the dresser and placed it on to and securely fastened it with screws from the bottom side of the original top of the dresser.  And this is how I repurposed a dresser to become a sewing table.  Hope you all learned something and enjoyed it.  Thanks for reading and take care.


Wednesday, September 7, 2016

What do I do with ash from a bon fire?

           Well the title of this blog was actually messaged to me from Will in American Fork, UT.  So I figured why not lets touch on this subject.  Everyone loves a good bon fire, but afterwards there is that pesky ash just sitting there as an eye sore to everyone.  So before you can do anything with this ash you need to make sure that it is not hot.  You can do this pour water over the ash, if it sizzles then it is still hot, if it doesn't then it is ready to be used.
 
            Ash from a wood fire contains Potassium Carbonate (aka potash) and Calcium Carbonate.  These two elements are great for enriching soil.  You can take the ash and spread it around your yard or your garden.  Some people even fertilize their pecan trees with the ash from a wood fire.  I knew one farmer who would store all of his ashes from his wood burning stove and in the spring when he was tilling up his garden plot, he would spread the ashes around the plot and then till the ashes into the ground.  And he produced some of the biggest tomatoes I had ever seen. 
 
            You can use the ash to neutralize acidic soils.  If your plants don't need an acidic soil, meaning a pH of 6 or lower, then spread your ashes around them.  It is good to keep your soil between a pH level 6 and 7.5.  If below 6, then the plants will not receive the right amounts of nitrogen, phosphorus, and potassium.  And if above 7.5, then the plants will not receive the right amounts of phosphorus, magnesium, and iron.  So ash can help stabilize the soil for you.
 
           In states that do have freezing weather, you can use the ashes to melt ice and snow.  This is effective due to the potash in the ashes.  And this has three huge benefits: 1) potash doesn't corrode or helps the breaking of metal and concrete, 2) it does not add salt to fresh water when there is run off from the melting ice, and 3) it helps create traction for vehicles.
 
           A few other things that wood ashes help with are enriching compost, removes oil stains on concrete, deters pests like slugs and snails, and it helps get rid of odors.  So there are several different things that can be done for the unappealing ash pile after a bon fire.  Use them and you might be amazed at what your garden and yard might grow into.  Enjoy my friends.

Saturday, September 3, 2016

How to Rip a Board with a Table Saw

          There are times when people are building objects/furniture and they need wood to be exact widths. There is a couple of options to make sure this happens. One, you could go to a lumber yard and buy some wood the proper width, or two, you could rip the board yourself.  If you have any extra lumber around you could easily re-purpose the wood by ripping it.  


          So there are a few steps to ripping a board.  First is set up your table saw.  Make sure the saw is on a level surface.  This is important, so the saw can make an accurate cut.  The next step is that you have a guide for the saw and make sure that the you measure the distance so there is an accurate width for the cut.  You always need to measure the front part of the blade and the back part of the blade.  This is the best way to make sure the distance between the guide and blade are the same distance.  

          
          The next step is to make sure the wood is lined up perfectly up against the guide.  This is to assure that you will have a proper cut with the right distance.  And when you are pushing the wood through make sure you use a push guide.  This is important so that you do not cut any fingers or other parts of your body when the wood gets close to the blade.  

          And when your cut is complete and if there is not any other wood to be cut, turn off your saw.  This is a good thing to do because sometimes accidents do happen.  So it is better for the saw to be off just in case you trip or accidentally place your had on the saw.  And the piece you ripped off the board could be used for other projects around the house or it can be discarded.  My sliver of ripped wood is going to be used as a trim piece for my screen porch..


          I hope you enjoyed this blog.  There is more to come with this little handy table saw project that I have just begun.  I am re-purposing this wood to use as a counter top for my wife's sewing table.  So I look forward to you reading the next blog.  Stay safe and enjoy my friends.

You can also view my wife's blog at mossandsaltwater.wordpress.com