Saturday, September 3, 2016

How to Rip a Board with a Table Saw

          There are times when people are building objects/furniture and they need wood to be exact widths. There is a couple of options to make sure this happens. One, you could go to a lumber yard and buy some wood the proper width, or two, you could rip the board yourself.  If you have any extra lumber around you could easily re-purpose the wood by ripping it.  


          So there are a few steps to ripping a board.  First is set up your table saw.  Make sure the saw is on a level surface.  This is important, so the saw can make an accurate cut.  The next step is that you have a guide for the saw and make sure that the you measure the distance so there is an accurate width for the cut.  You always need to measure the front part of the blade and the back part of the blade.  This is the best way to make sure the distance between the guide and blade are the same distance.  

          
          The next step is to make sure the wood is lined up perfectly up against the guide.  This is to assure that you will have a proper cut with the right distance.  And when you are pushing the wood through make sure you use a push guide.  This is important so that you do not cut any fingers or other parts of your body when the wood gets close to the blade.  

          And when your cut is complete and if there is not any other wood to be cut, turn off your saw.  This is a good thing to do because sometimes accidents do happen.  So it is better for the saw to be off just in case you trip or accidentally place your had on the saw.  And the piece you ripped off the board could be used for other projects around the house or it can be discarded.  My sliver of ripped wood is going to be used as a trim piece for my screen porch..
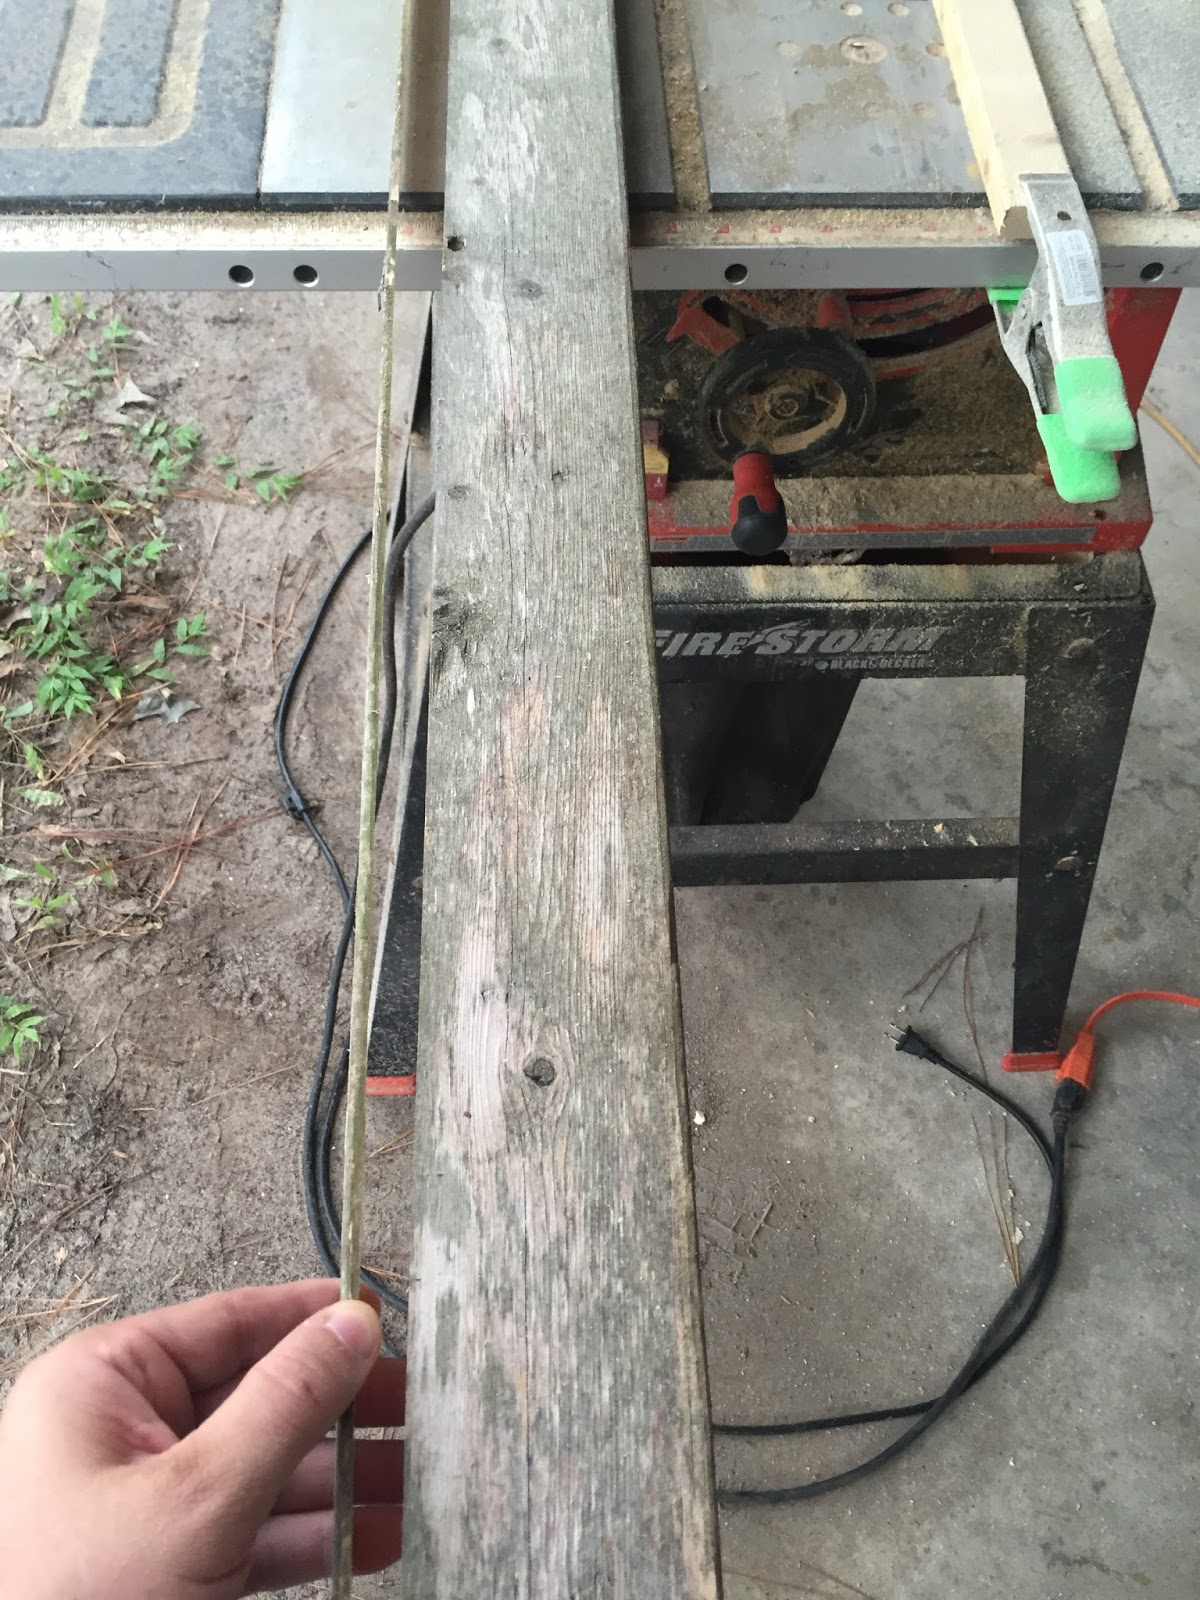

          I hope you enjoyed this blog.  There is more to come with this little handy table saw project that I have just begun.  I am re-purposing this wood to use as a counter top for my wife's sewing table.  So I look forward to you reading the next blog.  Stay safe and enjoy my friends.

You can also view my wife's blog at mossandsaltwater.wordpress.com

Friday, September 2, 2016

Table Saw Safety


            So this week I have been working on my table saw.  I am in the process of making some new furniture pieces and modifying an old dresser into a desk for our arts and crafts room (which will be another blog).  So I thought, "what the heck let's do a safety blog for table saws."  And why not, even on farms you have to build stuff.

                 So some of the key things you need are safety glasses, ear protection, some people like gloves, and a guide.  It is obvious that wood pieces do fly around when they are being cut especially when you are ripping wood, so have some safety glasses on your face to protect your eyes.  Ear protection is good to help protect your hearing.  I am not a big fan of gloves; however, they could help keep you from getting splinters.  I like to use a guide, especially when the wood is getting close to the blade.  This helps from you getting your fingers cut off.  

                 When you are cutting wood and the cut is complete, remember to never walk away from the saw while it is still running.  Sometimes accidents happen and you could slip and fall into the running blade.  Always cut the saw off when you are not actively cutting wood.  Always think safety first whenever you are using any power tools.  Stay safe my friends.  

Check out other blog and products at https://mossandsaltwater.wordpress.com.

Tuesday, August 30, 2016

More than Farm Life

            So I have had some messages in my inbox today asking about why I wrote about sitting by the fire, instead of something about farming.  It is simple.  Life on the farm is more than just about farming.  It is about life in general and in some instances the circle of life (no not the Elton John song from the Lion King).  

            So being on a farm isn't necessarily sitting on a hundred acres, it could be sitting on half an acre.  That half an acre could be one of the most lucrative micro-farms in the area.  Life on the farm is about family and watching kids learn and become fascinated with nature.  My two youngest kids love animals and would give their left arms for any animal.  Farm life is about that quality time you spend with your family and animals.  It is about those little moments in life where you have your A Ha moments.  

            Life on the farm is about watching both the birth of an animal and the death of an animal, whether it is for food or from old age.  It is about replenishing the Earth's soil with crop rotation and adding nature's own fertilizer in the mix.  While farm life can be hard and grueling at times; however, it can be most rewarding as well.  

           Remember it is how you choose to make your life, whether you have to overcome adversity or everything is kosher.  Be happy, live life to the fullest, and spend that quality time with the ones or animals you love.  And remember the farm life is about more than just farming.  Take care my friends. 

Check out other blog and products at https://mossandsaltwater.wordpress.com.

Monday, August 29, 2016


Sitting by the Fire

         As a kid growing up, I always enjoyed the time I would sit by the fire no matter whether it was with family, friends, and a group of people from church when we would go camping.  It always brought fun times of story telling and s'mores. I mean who doesn't like a good s'more, I know I still do.  Sitting by the fire was just simple fun.

            Now as an adult, I find myself reflecting more about life when I sit by the fire.  I noticed this change when I was a Specialist in the Army on a recon team sitting in the middle of Ft Hunter Liggett on a very chilly January night.  As everyone would speak it seemed that more times than not we would just stare into the fire and think about stuff, whether it was back home or when we were kids.  And then sitting in a field in Iraq waiting for the Chinooks to come pick us up on a deserted Iraqi Army base.  The whole company sat there talking and reflecting about the brothers we lost on that deployment or what it was going to be like when we got back to the United States.  

             I have made a designated area for my burn pile.  My family will sit there and the kids will make s'mores and tell funny stories. And I catch myself watching the flames dance and flicker into the air. I think about the times when life was carefree as a kid and how I enjoy my time with the kids as they goof around and tell these tall tales.  Life was definitely simpler then.  Sometimes I even catch myself think about what will the future hold and how to deal with certain events of life.  

             So if you have moments where you need to reflect and you just can't seem to do it. The answer is simple: sit by the fire.  Let the dancing of the flames help you reflect and relax.  I guarantee you will be able to reflect, reminisce, and relax.  And heck go ahead and make yourself a good s'more or two. Enjoy my friends.

Check out other blog and products at https://mossandsaltwater.wordpress.com.

Saturday, April 5, 2014

A different way to grow potatoes

I have done a lot of research on how to grow potatoes.  After conducting my research I decided to grow potatoes in a barrel.  I found that this is a great method in urban areas where people just don't have a lot of space for root plants.  So why not step out of the box and try something different.  Well last year I tried but the fire ants had other palms for me and my potatoes were destroyed.
Well this year, I am trying it again.  So I am planting Yukon Gold and Red Potatoes.  The supplies needed are two 32 gallon trash cans (or you can use any type of barrel), peat moss, top soil, bricks or anything to get the barrel off the ground, and of course the seed potatoes.  Potatoes like acidic soil so it is important to mix the top soil with the peat moss and I have done a two parts peat moss to one part top soil mixture.

So this how I prepared for my new gardening adventure.  I found a level spot that got plenty of sun light during the day.  Then I drilled 1/4" holes in the bottom and parts of the lower sides to give the barrel adequate drainage.  I then placed the bricks on the ground and placed the barrel on top.  I added 4" of peat moss/soil mixture evenly across the bottom of the barrel.  Then I placed my seed potatoes in the mixture to where the eyes pointed up towards the sky. 

Now after the potatoes start growing their vines, I will place more of the soil mixture in to the bottom of the leaves.  And I will continue to do so until the growth reaches the top of the barrel.  According to all of my research, this method should produce up to 32 pounds of potatoes.  Now I do use fertilizer; however, I choose to use fish fertilizer since it is organic. And I fertilize once every month.  

You will know it is time to harvest when the leaves on the vines start turning brown and falling off.  I hope this helps everyone learn how to garden by using less space and thinking outside of the box.  Happy Gardening.

Sunday, December 8, 2013

Best natural fertilizers

Throughout my experience gardening, there are a few things that I have picked up on.  One of the most important ones would be the type of fertilizer to use.  I believe everyone starts thinking about 10-10-10 or Miracle Grow, but are they the best and only ones out there.  The answer is simple, NO!  In fact there are some organic fertilizers that would trump these any day of the week.

The type of fertilizers that I am talking about are manures (cow and poultry), worm castings, and fish fertilizer.  I have done a series on my YouTube channel (aandbfarm) about how well our worm castings work.  I have found that worm castings increased the growth rate of our vegetables exponentially about 3 times faster than the normal growth rate.  As a kid, my family would use poultry manure in our garden to help fertilize our garden.  Our veggies would grow quicker and faster.  One important thing to know about poultry manure is that it needs to be put in the sun to help kill any bacteria that is in it before applying it to your garden.  And finally fish fertilizer.  I have used fish fertilizer a few times and I would rate it up there with the worm castings.  I have seen about the same rate of growth as worm castings.  The only downfall to fish fertilizer is that it's very smelly.

In conclusion, there are more ways to fertilize your garden than just using 10-10-10 or MiracleGro.  By using organic elements like fish manure (fertilizer), worm castings, and poultry manure are ways to fertilize your garden naturally.  Plus they are a healthy alternative to fertilizing and are organic. So go out there and give it a try and see for yourself. 

Happy Gardening.

Sunday, November 17, 2013

So its been more than a year since my last post.

Well there has been a lot of changes with A and B Farm in the last year and nine months.  We continued to raise chickens and pigs until the fall of last year.  Then we planted some nectarine and apple trees.  And eventually tried some raised beds.  Everything was working fine until the outer effects of Hurricane Sandy ripped our greenhouse in half.  And then we had family members who got extremely sick, so we had to relocate back to suburbia.  So now we are living in the house we originally lived in when we started our family and it only has half an acre.  This is a big change.

So today's lesson is one that I have found quite interesting and that my wife picked up from one of her friends.  We love pineapples and sometimes pineapples can get quite expensive.  So what is better than buying pineapples, growing them exactly our thoughts as well.  However, we do not live in Hawaii where pineapples are plentiful and grown in fields (not on trees like a lot of people think).  And this is the story of how we are growing a pineapple.

We took the pineapple and cut the top of the pineapple off.  Instead of throwing it away we put it in a bowl of water and let it sit for about a month.  This process allowed the stem of the pineapple to start growing roots (this process is called rooting).  Once the roots were established, we then planted the plant in a pot of soil.  It takes pineapples two years to grow into a full mature fruit.  We have kept our plant outside on our porch so it get the most optimal sunlight to help the growth process, plus natural light is way better than artificial light. 

Now the picture below depicts our pineapple at 6 months of growth since planting in soil.  And make sure your pineapple is fully mature before harvesting due to it can be poisonous if it is consumed.  I hope you did in fact learn something from this post, because learning makes everyday a new adventure.